
Building chatbot flows
Design intents, collect details with parameters, send replies with buttons, handle unrecognised messages and connect data, AI and people.
This page covers how the pieces of a chatbot flow fit together: intents that recognise what people want, parameters that pull details out of their messages, replies with buttons, a fallback for everything else, and the nodes that fetch data or hand over to a person. For canvas basics such as adding, connecting and grouping nodes, see Building flows.
Plan the conversation first
Before you add nodes, list:
- What people will ask for. Each distinct request becomes an intent, for example "order a pizza", "track my order", "opening hours" and "talk to a person".
- What you need from them. Details such as a pizza size or an order number become parameters on the intent, or fields in a Form when there are several.
- Where the answer comes from. Fixed text goes in a Reply; live data comes from an API call or a Data Store; open questions can go to an AI Agent with your knowledge base.
- What happens when the bot cannot help. A fallback reply, and a Live Chat handover if your team takes chats.
Trigger
 ├─ OrderPizza    → Reply (size buttons)
 ├─ SelectSize    → Data Store (save order) → Reply (confirmation)
 ├─ TrackOrder    → API (order status) → Reply
 ├─ TalkToPerson  → Live Chat
 └─ Fallback      → Reply
Connection rules
A chatbot flow starts at its single Trigger node. The canvas refuses connections that break these rules:
| Rule | Why |
|---|---|
| Only one Trigger node per chatbot project. | Every conversation has one entry point. |
| A Trigger connects only to Intent nodes. | Every incoming message is matched to an intent first. |
| An Intent cannot follow a Reply or Live Chat node. | Intents are reached from the Trigger, or from a button's Target Intent. |
| A Router cannot connect to an Intent node. | Same reason. |
| An Intent node connects to one next node. | Branch after it with a Router. |
Intents
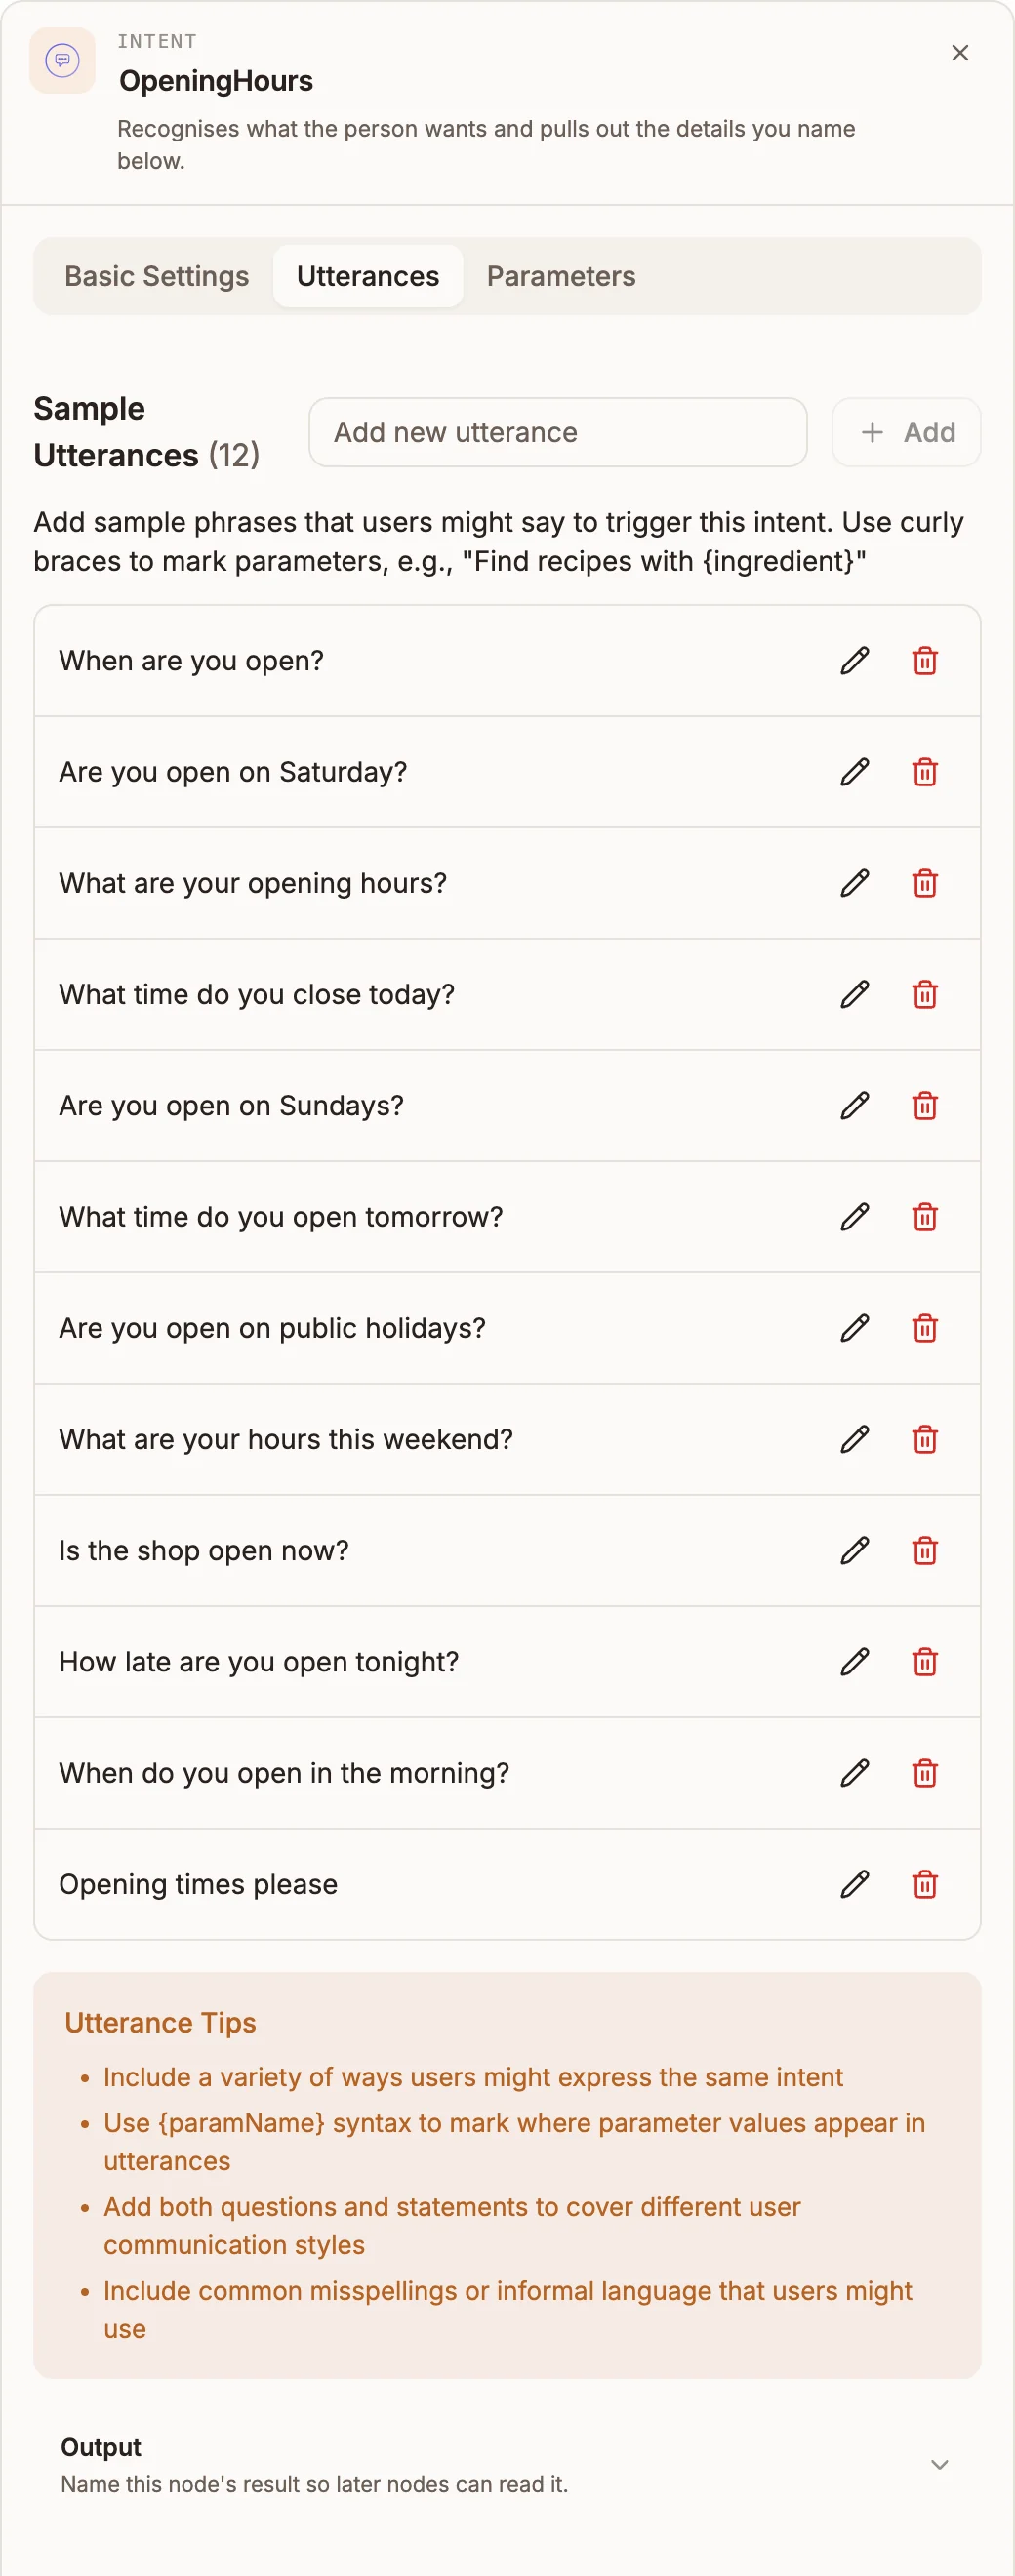
An Intent node describes one thing people ask for. When a message arrives, Buni.ai compares it with the sample utterances of your intents and runs the one that matches best.
The Intent panel has three tabs:
| Tab | Field | What to enter |
|---|---|---|
| Basic Settings | Intent Name | A unique name such as BookAppointment. Required. |
| Locale | The language variant of the intent. | |
| Utterances | Sample Utterances | Example messages. Type one in Add new utterance and press Enter. |
| Parameters | Add Parameter | Details to extract from the message. See Parameters. |
Below the tabs, Output › Output variable names where the intent's result is stored. See Where the values go.
Writing good sample utterances
- Add at least 10, worded differently: questions, statements, short and long, with and without typos your users make.
- Give each intent its own phrases. The same or overlapping utterances on two intents make matching unpredictable, and validation flags them.
- Keep each utterance on one line and under 200 characters.
- Mark a detail with a placeholder in braces, such as
I'd like a {pizzaSize} pizza. The name must match a parameter on the same intent. Use{slotName}, not${slotName}, in utterances. - Only one intent in the whole flow can have an utterance that is nothing but a placeholder, such as
{pizzaSize}. - Do not use the reserved names
CancelIntent,FallbackIntent,HelpIntent,StartOverIntentorStopIntent.
Parameters
A parameter pulls one detail out of the message, such as a date, a number or a city. Select Add Parameter on the Parameters tab and fill in:
| Field | What it does |
|---|---|
| Parameter Name | camelCase, no spaces, for example pizzaSize. |
| Parameter Type | What kind of value to recognise: Date, Time, Number, Phone Number, Email Address, City, Country, First Name, Free Form Input, Geolocation (GeoPoint) and others, or Custom Parameter for your own list. |
| Default Value (Optional) | Used when the person does not give a value. |
| Required | When on, the bot asks for the value before the intent continues. |
| Elicitation Prompts | The questions the bot asks when a required value is missing, such as "What size would you like: small, medium or large?". A required parameter must have at least one. |
A Custom Parameter also needs a type name and sample values with synonyms, for example large with synonyms big and family size. Its Resolution Strategy is either Expand Values (accept variations and synonyms) or Restrict to Slot Values (accept only the values and synonyms you defined).
Use one parameter type at most once per intent.
Where the values go
When an intent matches, its parameter values are saved to state under the intent's Output variable. If you leave it empty, Buni.ai uses the intent name without spaces.
For an intent OrderPizza with output variable order and a parameter pizzaSize, later nodes read the size as {{state.order.pizzaSize}}. See Variables for how to use values in text and conditions.
Replies
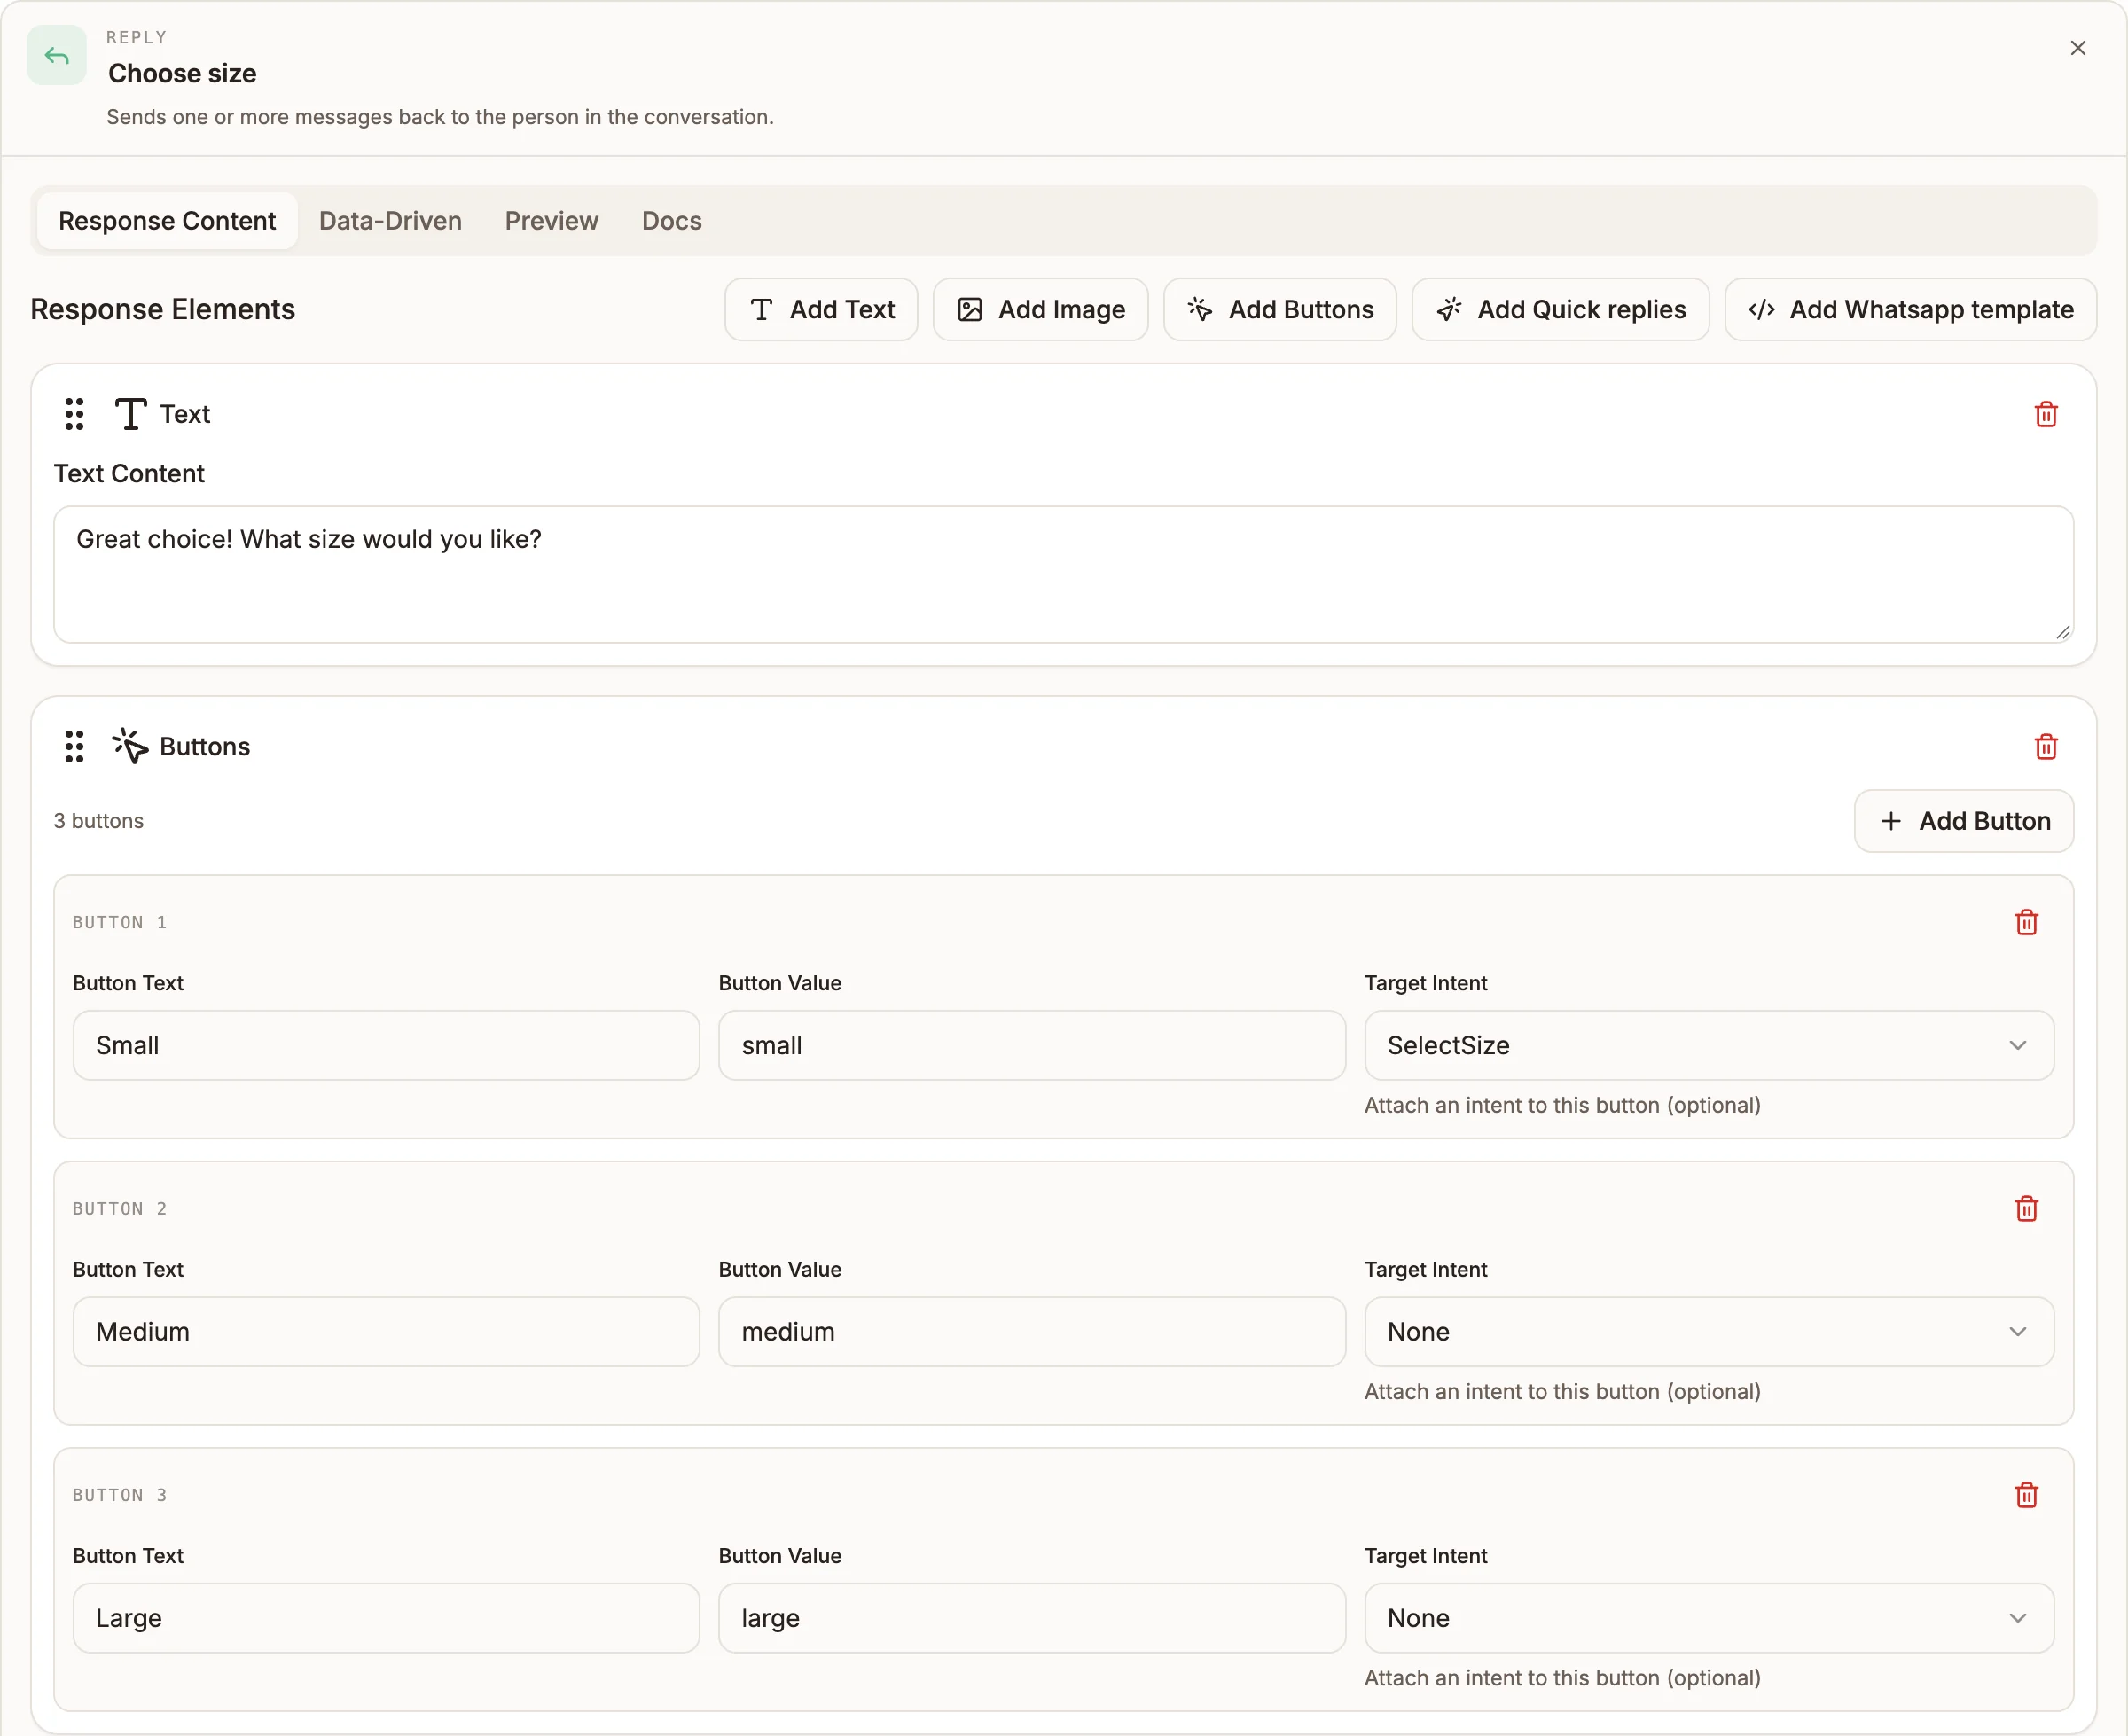
A Reply node sends one or more messages. On the Response Content tab, add elements in the order they should be sent:
| Button | Sends |
|---|---|
| Add Text | A text message. Can include variables, such as "Thanks, {{state.order.pizzaSize}} it is." |
| Add Image | An image from an Image URL, with an optional caption. |
| Add Buttons | Buttons the person taps. |
| Add Quick replies | Short suggested answers shown as chips. |
| Add Whatsapp template | A pre-approved WhatsApp template. See WhatsApp templates. |
The Preview tab shows roughly how the reply will look.
Buttons and quick replies
Each button has Button Text (what the person sees), Button Value (what the bot receives when they tap it) and an optional Target Intent. Quick replies have the same three fields as Reply Text, Reply Value and Target Intent.
Set Target Intent to send a tap straight to that intent instead of matching the tapped text against all intents. This is how you continue a conversation after a Reply, since an Intent node cannot be connected after a Reply.
Channel limits apply when the message is sent:
| Channel | Buttons per message | Button title |
|---|---|---|
| First 3 | Cut to 20 characters | |
| Messenger | First 3 | Cut to 20 characters |
| First 3 | Cut to 20 characters |
If you need more than three choices on these channels, split them across several Reply elements.
Replies built from data
On the Data-Driven tab, turn on Enable Data-Driven Responses to send one message per item in a list, for example a list of products returned by an API call. Set Data Source Variable to the variable that holds the list, map the fields (Title Field, Subtitle Field, Image URL Field, Button Text Field and so on), and choose a Message Grouping: Individual Messages, Carousel or List.
Handle messages the bot does not understand
Add an Intent node whose only sample utterance is Fallback, connect it to the Trigger, and connect it to the reply you want unrecognised messages to get. Buni.ai routes every message that matches no intent there.
Without one, unrecognised messages get a built-in English reply, "Sorry, I don't understand that. Can you try again?", and validation shows a No Fallback Intent warning.
Good fallbacks tell the person what the bot can do, offer buttons for the most common requests, or hand over to a person with a Live Chat node.
Collect several details
To ask for several values in a row, such as name, email and preferred date, use a Form node rather than a chain of intents. A form keeps the conversation on its own fields until the person finishes, validates each answer, and lets them review before submitting. Its answers land in {{state.variableName}}, where variableName is the form's output variable.
Work with data and AI
After an intent, use any of these to do the work:
| Node | Use it to |
|---|---|
| API | Call your own backend or any HTTP endpoint. |
| Data Store | Save and look up records in a Buni.ai data store. |
| Integration | Run an action in a connected service such as HubSpot or Google Sheets. |
| Router | Branch on a condition, such as {{state.order.status}}. |
| Function or Set Fields | Reshape or calculate values. |
| AI Agent | Answer open questions from your knowledge base, or call APIs and data stores itself. |
| Collect Payment | Request a mobile money or card payment inside the chat. |
| Contact | Save the person to your contacts. |
For failed API calls and other errors, see Error handling.
Hand over to a person
Connect an intent (for example TalkToPerson) or a fallback path to a Live Chat node to pass the conversation to your team in the Inbox. A Live Chat node ends the bot's part of the flow. See Live chat handoff.
Common patterns
Question and answer
Trigger → Intent (OpeningHours) → ReplyLook something up
Trigger → Intent (TrackOrder, parameter orderNumber) → API → Router
  ├─ found     → Reply (status)
  └─ not found → Reply (check the number)
Confirm with buttons
Trigger → Intent (OrderPizza) → Reply (buttons Small / Medium / Large, Target Intent: SelectSize)
Trigger → Intent (SelectSize) → Data Store (save) → Reply (confirmation)
Answer from documents, then escalate
Trigger → Intent (Fallback) → AI Agent (knowledge base)
Trigger → Intent (TalkToPerson) → Live Chat
Checks before you publish
The canvas validates the flow as you build. Fix anything it reports before publishing. The chatbot-specific checks include:
- The Trigger has an Introduction Message and at least one platform.
- Every Intent has a unique Intent Name, at least one sample utterance, and no utterances shared with another intent.
- Every required parameter has Elicitation Prompts, and parameter names are camelCase.
- Every Reply has at least one response element, and each element has content.
- There is a fallback intent.
- A Live Chat node has an agent group and a transfer message.