
Hosted forms
Publish a web form from a Form trigger, share its test and production links, and submit to it from your own page with the public API.
A Form trigger gives your automation a hosted web page with a form on it. Anyone with the link can fill it in, and each submission starts a run with the answers as its input. You don't need a website: Buni.ai hosts the page.
Use it for intake forms, sign-ups, callback requests and surveys, especially for people who are not already talking to your bot. For a form inside a chat conversation, use the Form node instead.
Set up the form
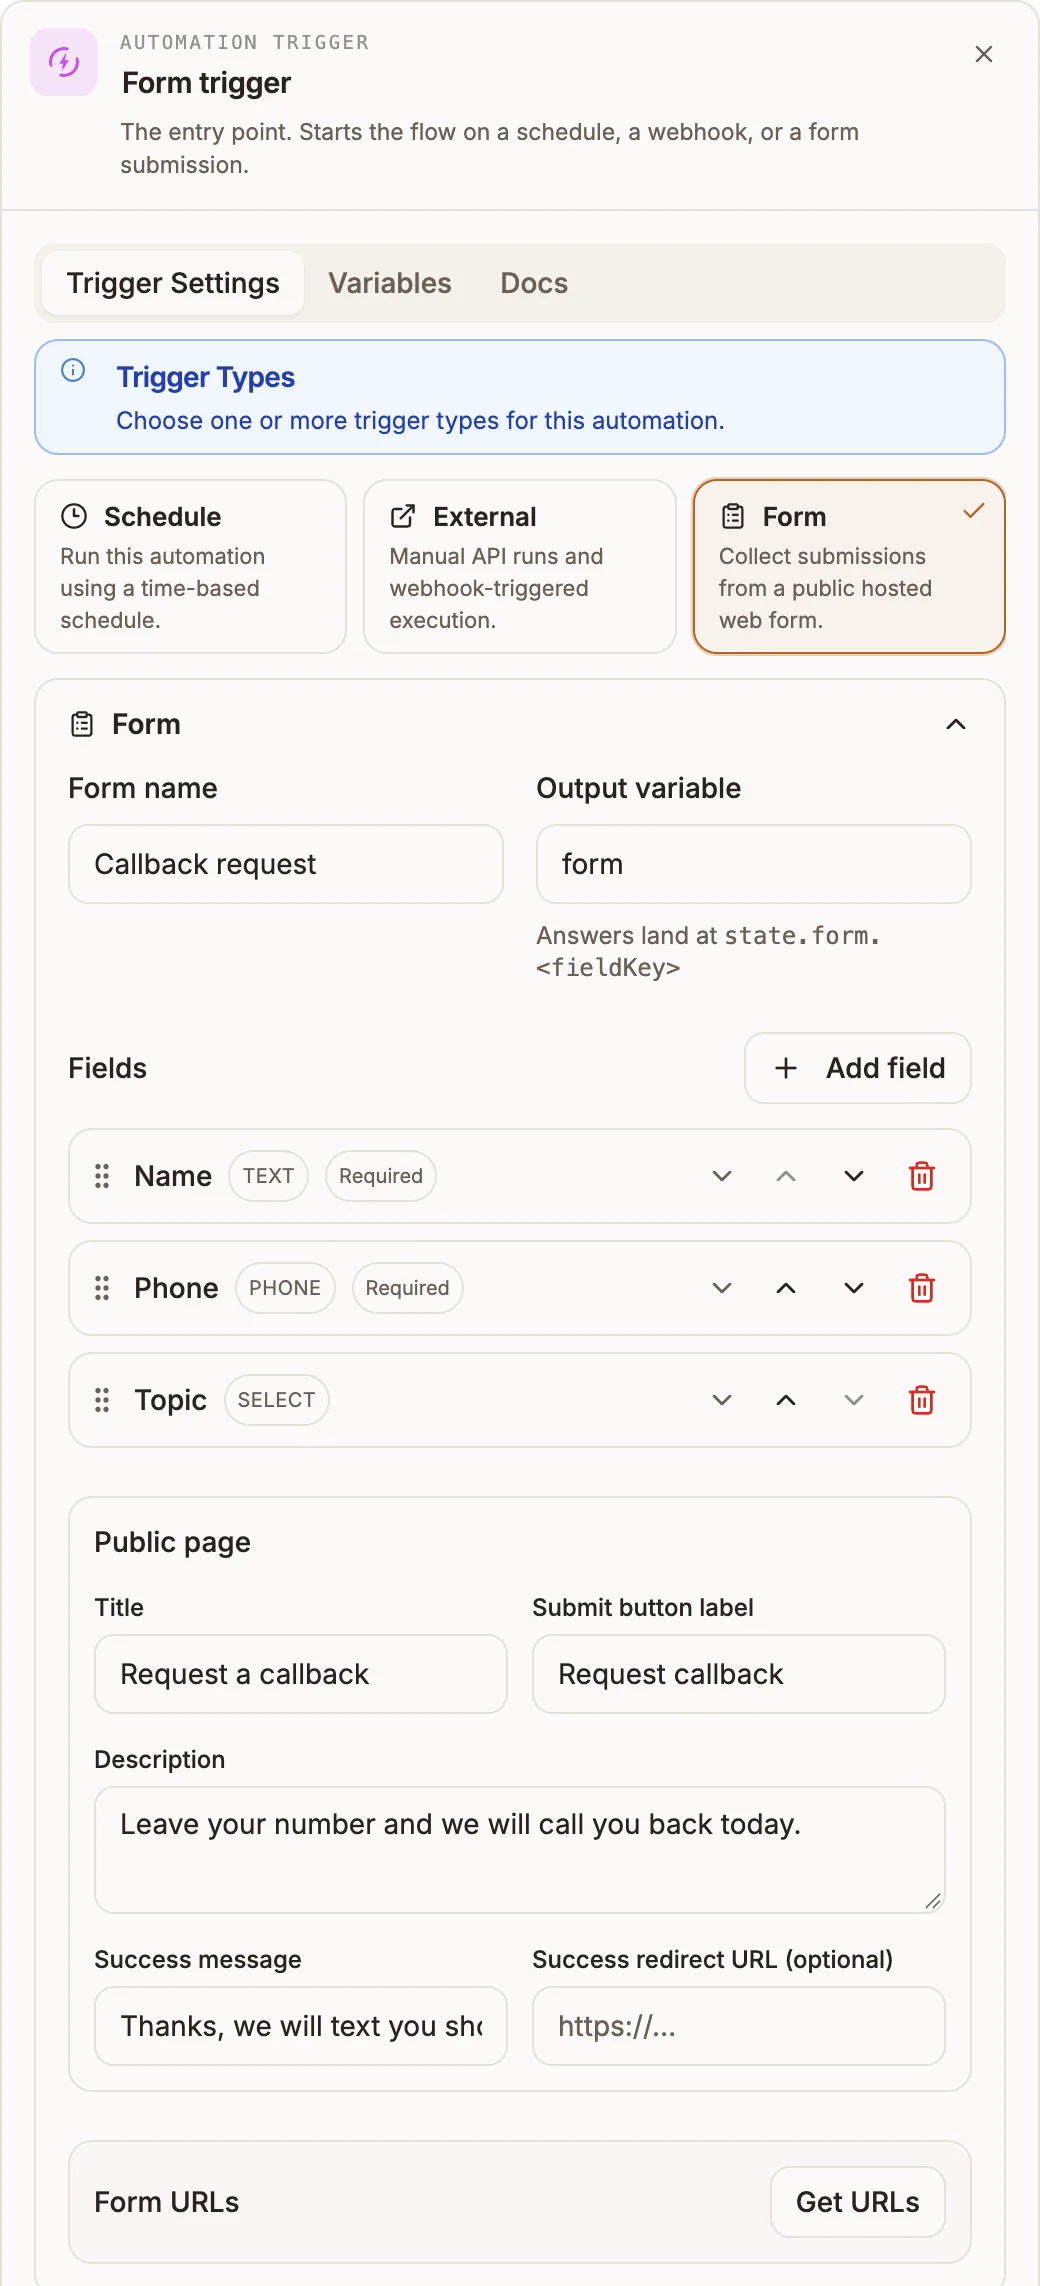
Open the automation's trigger node and select the Form tile, or drag in Form Trigger from the palette's Triggers group. Then fill in:
| Field | What it does |
|---|---|
| Form name | The form's name. The first link generated uses it as a readable slug. |
| Output variable | Where answers are stored. With the default form, a field with key email is at state.form.email. |
| Fields | The questions. Select Add field for each one. |
| Title, Description | Shown at the top of the public page. |
| Submit button label | The button text. |
| Success message | Shown after a successful submission. |
| Success redirect URL (optional) | Send the person to your own page after submitting instead. |
For each field, set its Key (the name in state), Type, Prompt / question, and optionally Placeholder, Help text, Required, Default value and Validation (optional), such as minimum and maximum length, a regex Pattern, or minimum and maximum values for numbers.
Field types
text, multiline, number, phone, email, select, multiselect, boolean, date, time, datetime, location and file.
Date and time fields can default to Auto-generate (submission time), which stamps the submission date, time or both.
Get the links
Under Form URLs, select Get URLs.
| Link | Runs | Format |
|---|---|---|
| Test URL | Your draft, as a test run. Use it while building. | https://<your Buni.ai domain>/automation/<slug>/form?test=1 |
| Production URL | The published version. Works only after you publish the project. | https://<your Buni.ai domain>/automation/<slug>/form |
Before the project is published, the Production URL shows "Form not available yet". An invalid or disabled link shows "Form not found".
The link stays the same when you rename the form, so links you have already shared keep working. If you do want the link to match a new name, select Update URL to match name. The old link then stops working and returns a 404, so only do this before sharing it, or when you mean to retire it.
File uploads
A file field uploads the file straight to storage, and the submission refers to it. Each file is limited to 10 MB unless the field sets its own limit. Uploaded files are scanned before the submission can start a run: a file that fails the scan is rejected, and a submission made while a file is still being scanned is asked to try again shortly.
Submitting from your own page
The hosted page is the simplest option. If you build your own form, it can post to the same endpoint the hosted page uses. The form's token is embedded in the hosted page; copy it from there only if you control both.
POST /api/public/forms/submit HTTP/1.1
Content-Type: application/json

{
  "token": "<form token>",
  "answers": {
    "name": "Ada Lovelace",
    "phone": "+233201234567"
  }
}
The submission is validated against the form's fields, then the run starts and the response waits for it.
| Status | Body |
|---|---|
200 | ok: true, the invocationId, and the form's successMessage and successRedirectUrl. |
202 | An uploaded file is still being scanned. Retry shortly. |
400 | Validation failed, with an errors array naming each field and problem. |
404 | Unknown or disabled form. |
409 | "This form is not published yet." |
413 | The submission is larger than 256 KB (answers only; files are uploaded separately). |
500 | The run failed. The body includes the invocationId so you can find it in the Activity tab. |
Using the answers
Every answer is available as state.<output variable>.<field key>, for example {{state.form.email}}. The answers are also at the top level of the run's input, so input.email works too.
Runs started by a form show Form as their trigger in the Activity tab.