
Support bot with human handoff
Build a chatbot that answers from your knowledge base with an AI Agent and hands the conversation to a person in the Inbox when asked.
In this guide you build a support chatbot that answers questions from your own documents and passes the conversation to a human agent when the customer asks for one. Agents pick the conversation up in the Inbox.
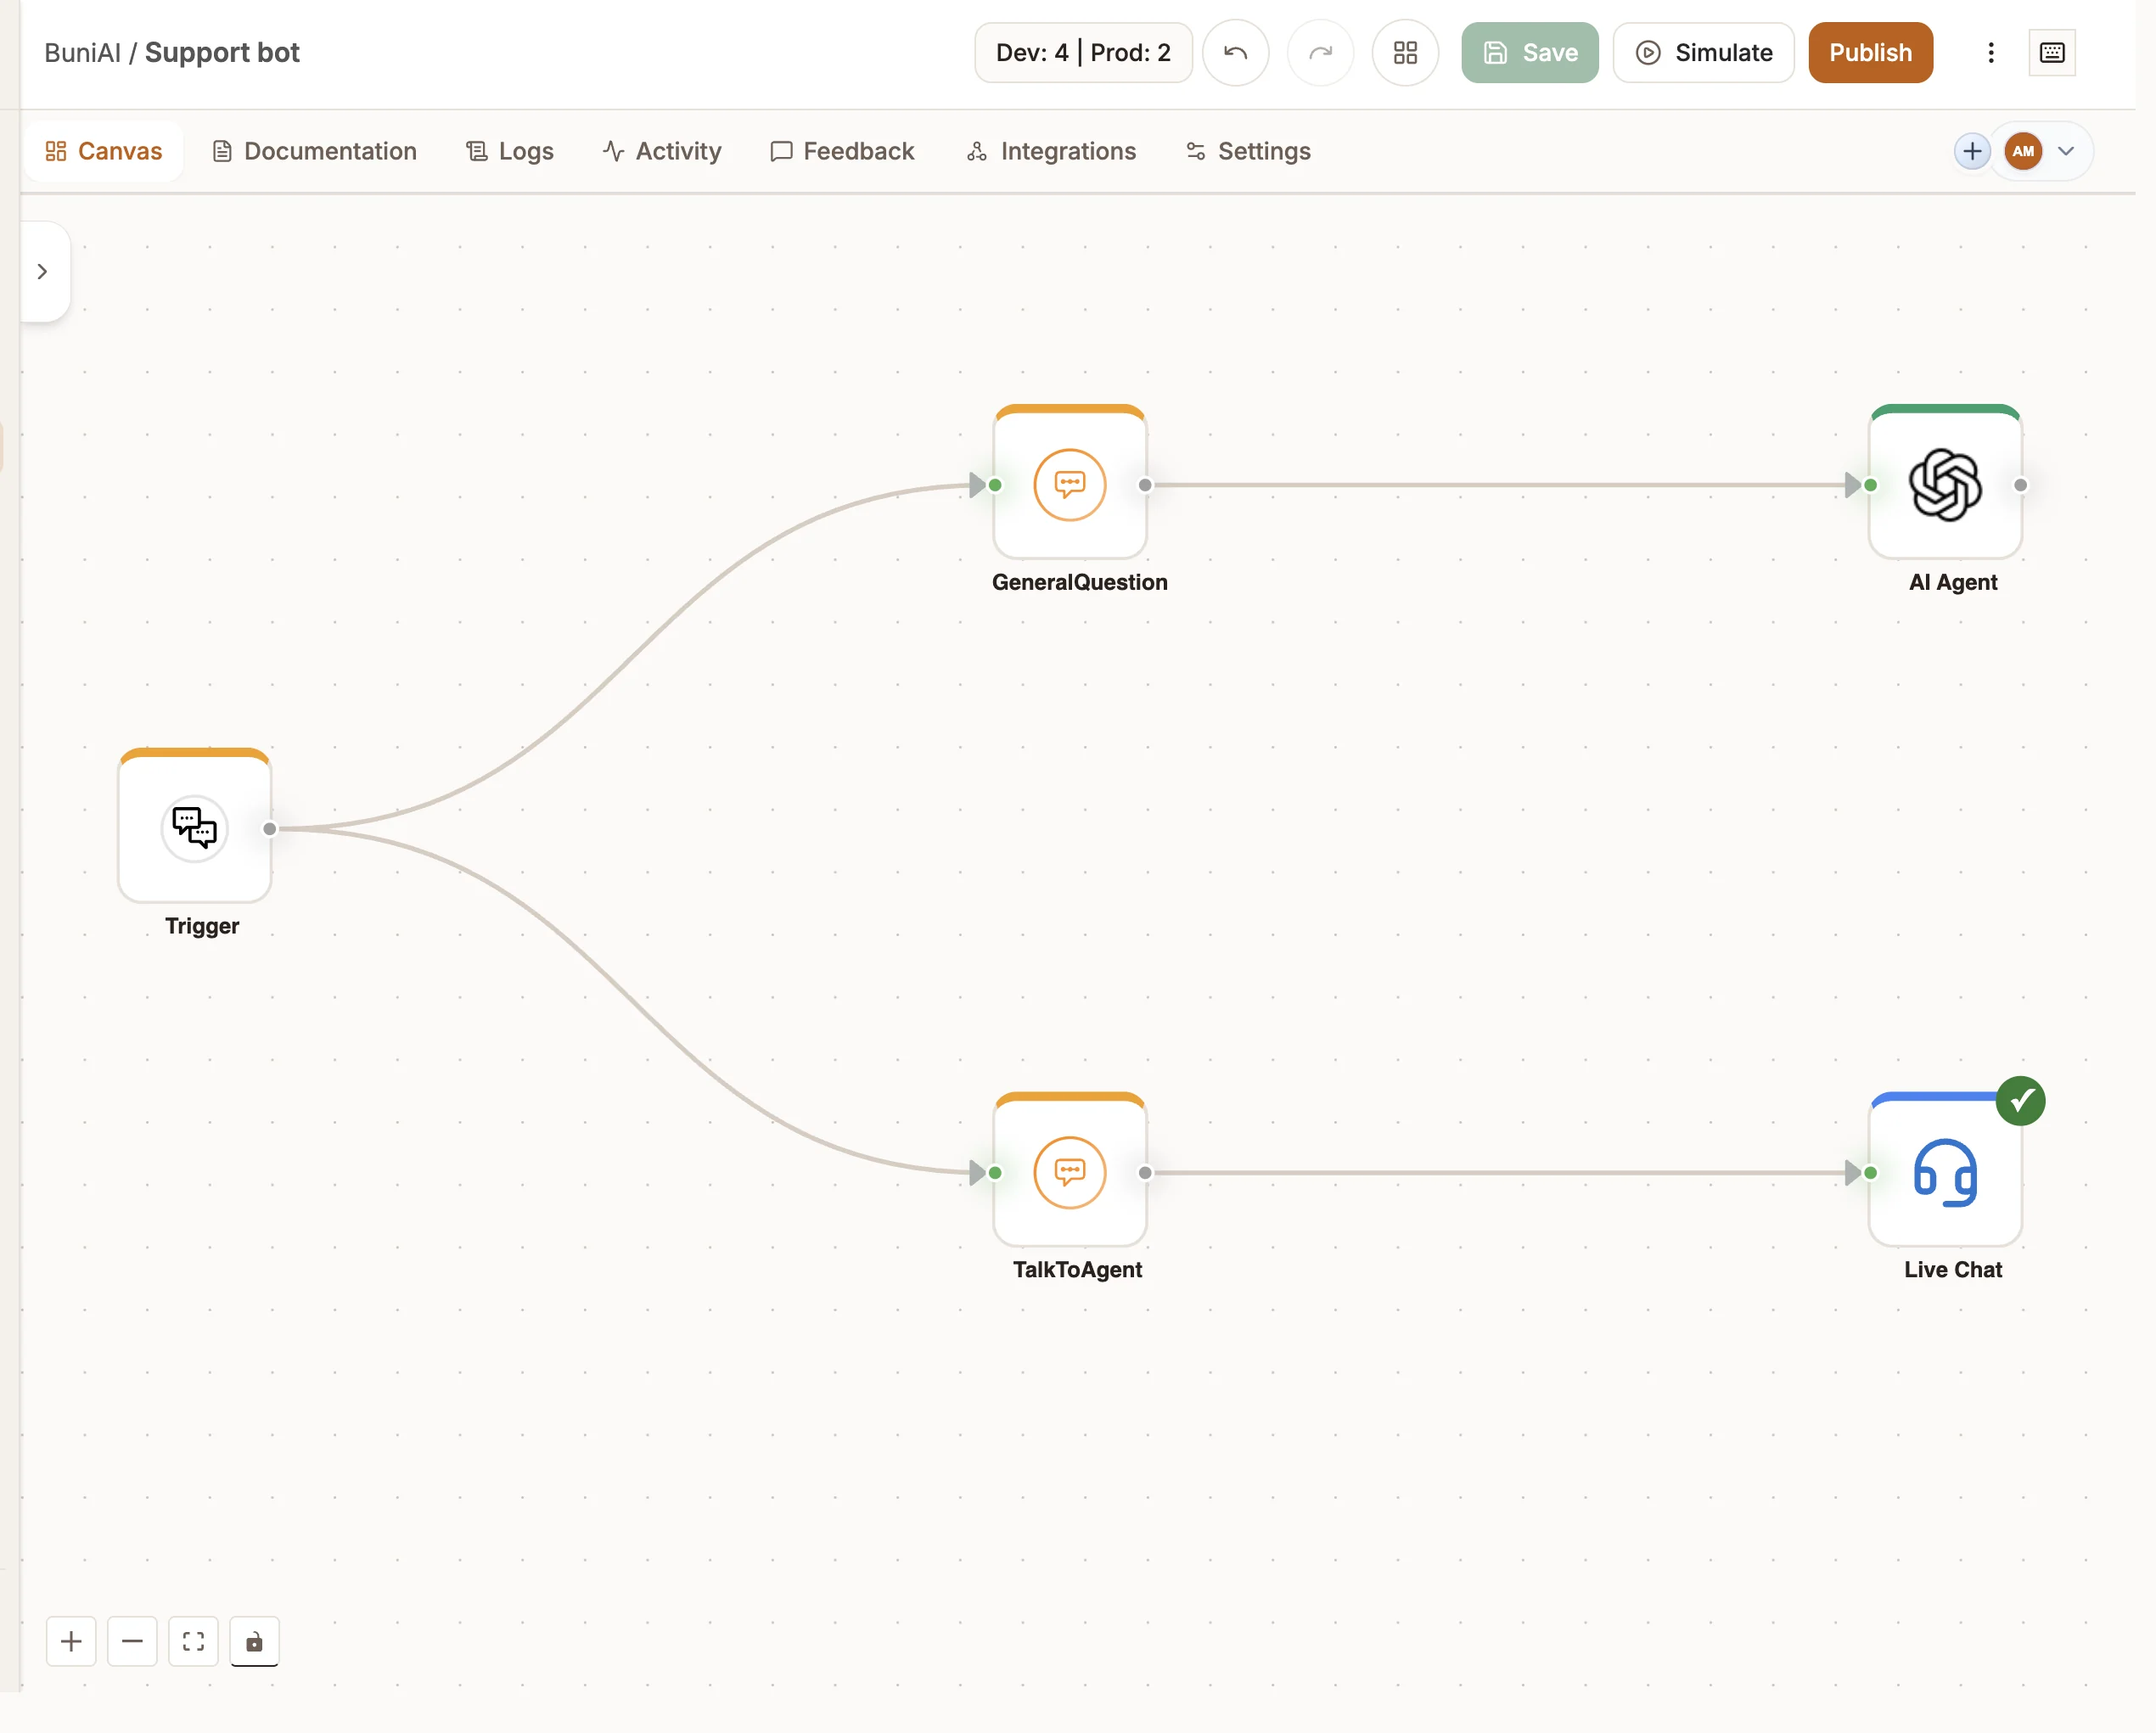
The finished flow:
Trigger
  ├─ Intent "GeneralQuestion" (catch-all) ─→ AI Agent (answers from the knowledge base)
  └─ Intent "TalkToAgent"                 ─→ Live Chat (hands off to an agent)
Before you start, you need:
- A Buni.ai workspace and permission to create projects.
- The documents the bot should answer from, as PDF, TXT, DOC, DOCX, CSV or MD files.
- An API key for the AI provider you want the agent to use, saved as a credential.
- The people who will answer chats, already added as members of your workspace.
Upload your documents
- In the main menu, open Knowledge Base and select Upload Document.
- Enter a Document Name and a short Description, choose the File, and select Upload Document.
- Repeat for each document.
Keep each document focused on one topic. See Knowledge base for size limits and how documents are indexed.
Create the chatbot project
Go to Projects, select New project, set Channel to Chatbot and create the project. The canvas opens with a Trigger node and a sample Intent node called Simple Greeting.
Open the Trigger node and, on the Platforms tab, select the channels the bot answers on, such as WhatsApp or Web. See Trigger for each channel's connection details.
Add a catch-all intent for questions
Every message is matched against your Intent nodes. Messages that match nothing go to the intent you mark as the catch-all, which is where the AI Agent should sit.
- Add an Intent node and connect the Trigger to it.
- On Basic Settings, set Intent Name to
GeneralQuestion. - On Utterances, add the single utterance
Fallback. An intent whose only sample utterance isFallbackreceives every message that no other intent matches. - Save.
You can delete Simple Greeting, or keep it if you want a fixed reply to greetings.
Add the AI Agent
- Add an AI Agent node and connect GeneralQuestion to it. Leave its output unconnected: in a chatbot, the answer of an AI Agent with nothing after it is sent to the customer as the reply.
- Select Model, choose a provider and model, pick your credential in API Key, and select Save. A low Temperature, such as 0.3, keeps answers consistent.
- Select Customer support specialist to fill Instructions and Prompt with a starting template, then edit Instructions to name your business and what the bot may and may not help with.
- Make sure Prompt includes the customer's message, for example
Customer message: {{intent.inputTranscript}}. - Turn on Knowledge base, select Browse knowledge base, and tick the documents you uploaded. They appear under Selected files.
- Save.
On each message, the agent searches only the attached files and answers from what it finds. See AI Agent for every setting.
Add an intent for "talk to a person"
- Add another Intent node, connect the Trigger to it, and set Intent Name to
TalkToAgent. - On Utterances, add the ways customers ask for a person, for example
speak to a human,talk to an agent,I want a real personandcustomer service. - Save.
Configure the Live Chat node
- Add a Live Chat node and connect TalkToAgent to it.
- On the Agent Setup tab, under Data Stores, choose an Agent Group Data Store and a Human Agent Data Store. If you have none yet, select Create HITL Agent Groups System Data Store and Create HITL Human Agents System Data Store. These are shared by every Live Chat node in your organization.
- Select Add Agent Group and create a group, for example
Support. - Select Add Human Agent for each person who will answer chats. The name field lists your workspace members; pick one and put them in the group.
- Under Agent Groups, choose Select Agent Group, and pick an Assignment Strategy: Round Robin, Availability Based or Skill Based.
- On the Messages tab, write the Transfer Message the customer sees while they wait, for example
Connecting you to our support team. Someone will reply here shortly.Leave Include conversation history on so the agent sees what the bot already said. - On the Fallback tab, choose a Fallback Action for when nobody is available, such as Add to Queue, and write the Fallback Message.
- Save.
For how assignment, queueing and each fallback action behave, see Live chat handoff and Live Chat.
Set your hours
Open the project's Settings tab and select Hours.
- Set Time zone. The AI Agent also uses it to know today's date.
- Turn on Tell people when nobody is available, set Opening hours, and write What to say outside these hours. Add Closed dates (optional) for public holidays.
Outside these hours, a customer who asks for a person is told when the team is back instead of being promised a quick reply. The conversation is still queued. See Business hours.
Check that it worked
- A question covered by your documents gets an answer based on them.
- A question outside your documents gets a statement that the bot does not have that information. If the bot guesses instead, tighten Instructions and lower Temperature.
- Asking for a person sends the Transfer Message, and the conversation appears in the Inbox for an agent in the group you chose.
- The agent's reply from the Inbox reaches the customer on the same channel. See Replying.